Tuesday, July 22, 2008

Grey Card Results

Amy has been advising for months that I get a grey card. I have intended to do so, but it just never happened. I kept thinking I didn't want to spend $10.00 on shipping for a $5.00 item. I finally found myself at a local camera shop and purchased 1 (actually 3 because they come in a pack). I was floored by the results.

I used two props. The grey card was undeniably the best exposure in each situation. And I did each in Program Mode, Manual Mode and Manual Mode using a grey card.

(click to enlarge)


On the inside settings when using the grey card, my metered measured +1.5 for the correct exposure. When outside in the shade/overcast day, my metered measured +2 for the correct exposure. Does that mean in those situations I should meter + 1.5 or +2 respectively all of the time?

Friday, July 18, 2008

Take II

We went rafting today down the Payette River (South Fork). We had to go through Emmett to drop of the kids. On the way is Black Canyon Resevoir. This is Take II for my water in motion picture. It is still not quite what I want but I am getting closer....

I love wheat fields...Here are a few pictures from one we saw today. These were all taken in the "golden hour". Around 7 pm.
I'm going to name this one "A Head Above the Rest"

Thursday, July 17, 2008

Composition Assignment

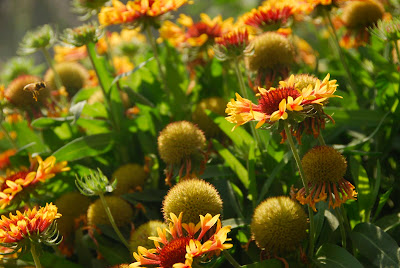
Assignment: Compose one subject 5 different ways. Think of different point of views, angles, and depth of field.

Nothing like a Circular Polarizing Filter and Nature Shots (that aren't moving every second) to boost your photography confidence! SOOC for all 5 images.

1. ISO 1250, SS 1/250, F13


2. (cool bee, huh?)
ISO 320, 1/250, F7.1


3. ISO 640, SS 1/125, F18


4. Couldn't decide

ISO 1250, SS 1/500, F9


ISO 160, SS 1/160, F5.6


5. ISO 160, SS 1/160, F 5.6


Neighbor

My neighbor stopped by last night. She had her 4 month old baby with her so I snapped a few shots. These were the best ones. I have quite a few "hot spots" because of his white shirt, but I still like his expression.


Quite the drooler??!!

Monday, July 14, 2008

Grapes

I am proud of our little garden but we love our grapes. They make our backyard seem so much greener since they cover up the bright vinyl fence. This is their 3rd season (which is when they are supposed to start producing). We are thrilled with all of the grapes that are growing.

Finally; water movement

I have wanted for a long time to take a waterfall picture to get that "cotton candy" look. Today I finally took my camera on my walk. I think this is far from perfect and from what I have imagined in my head, but it is a good first try. I used my tripod for the first time...I'm gonna need more practice with it!! :)

(click to enlarge)

Sunday, July 13, 2008

Fireworks

I tried to shoot some firework shots and it didn't work out. Later I found this information on one of my favorite sites http://www.thepioneerwoman.com/. Better luck next year!

"1. always, always use a tripod. it’s absolutely necessary. If you don’t have a tripod, you can try lying on your back on a blanket or towel, and resting the camera back against your face (hey, I’m just trying to help here!) The point of all this is, your shutter speed is going to be very, very slow, so the slightest movement will result in a blurred photo. If you use a tripod, you just push the button and wait.

2. Extremely slow shutter speed, like 20 to 30 seconds long. Aperture around f8. ISO at 100. This means you’ll have to put your camera on manual. Don’t be scared!

3. I use a wide angle lens, anywhere from 12 mm to 18 mm. If you have a digital SLR camera, the kit lens likely has a fairly wide angle. A wide angle is necessary in order to capture all the explosiveness!

When the fireworks begin, adjust your tripod so the camera’s pointing toward the fireworks. Get it in focus, either with Auto focus or Manual, and you’re good to go! When you’re ready to take a photo, click the shutter release button and wait. It’ll be awhile before it clicks, and when it does, check your screen and see how the exposure is. If it’s too bright, adjust the aperture and make it smaller (higher number.) You want to leave your shutter speed really slow, because that’ll pick up all the trails and wonderful movement of the fireworks. And you want to keep your ISO low so your photos won’t be grainy. So adjust your Aperture ’til you get the right exposure and have a ball! Just shoot away, and don’t try to put too much thought into it. You’ll have fun looking at your photos later."

Saturday, July 12, 2008

Focus Panic

While camping this weekend, I was taking some great pictures of Lexi in the morning when it was just the two of us because the boys were fishing. That evening I got the camera back out and it was NOT working! I checked every switch (and there seem to be a lot) and everything was in order. Here is what I was getting....


I took a break from it, said a little prayer that I didn't somehow break the camera or the lens. I went back to it after a while...same problem. Again I checked everything. I repeated these steps at least 3 times. By the time I got home I decided I didn't want to worry about it all day Sunday so I took it to the camera store. Thank goodness they are open 'til 9 pm.
Let me introduce you to the Focus Selector (CSM) Switch. I don't have my manual in front of me but I think it stands for Continuous, Servo (or is it single?), and manual focusing. I promise I checked it several times. It was apparently half-way in between two settings. Phew! I am so happy my camera still works. I was in a bit of a panic for a minute.


The good news about this story (well besides I don't have to pay anything to have my camera fixed) is that I bought a "hood" while I was at the camera store. I have been noticing sun spots on some of my pictures and it is somewhat annoying. See below in the top left corner. The hood should keep the rays off of the lens.
I also FINALLY bought a grey card. I am excited to experiment with it. I hope I get some spare time tomorrow after church to play.
Yay!

Thursday, July 10, 2008

Difference of one setting; metering

I am posting this more for me than anything else. I want to be able to use this a reference for my own learning. Metering is crutial to getting the correct exposure. There are three types of metering: Matrix, Center-weight and Spot. At this point in my skill level, I don't plan on using Center-weight. So the difference of matrix and spot is demonstrated below. The only difference in these two shots was the meter setting.

As I understand it, Matrix metering interprets the whole scene and is great for landscape shots. It takes more of a light average.


Here I metered for the water and consequently the people are underexposed. Had I metered the people, the water would have been overexposed. Spot metering is best for face shots or when there isn't much light contrast in the picture.


Does anyone want to add in? Do I understand this metering correctly?

Wednesday, July 2, 2008

Assignment Part II; day time lighting

I never took the evening pictures of my assignment. Tonight I finally did it and here are the results. Definitely a beautiful time of day for photography. So much easier to get a good exposure. Granted these shots seem to still be far from perfect but they are such an improvement from the mid-day sun in the post below. All are SOOC unless otherwise indicated.

1.

ISO 250, SS 1/60, F5.3
He was under the patio cover here and I thought it was a little dark.

Edited version:


2.

ISO 160, SS 1/125, F7.1
Back lit sun. I think his face is under exposed, but his hair is blown out, right?

3.

ISO 160, SS 1/80, F7.1
I thought this one was interesting. Jaxon is in a shadow and the sun is hitting CJ. An example of how EVERYTHING in the frame can't always be a perfect exposure...

4.

ISO 160, SS 1/125, F 7.1

5.

ISO 160, SS 1/40, F 7.1


The shutter speed is way too slow here. I probably should have changed the ISO to 200 or 250 so the SS could be faster.

6.

ISO 160, SS 1/50, F 4.8
Again, the SS seems too slow for a portrait.

7.

ISO 160, SS 1/50, F4.8

8.


ISO 160, SS 1/640, F5
I included this one because I think it is a good example of a bad exposure. How should I have adjusted my settings to avoid this yellow color cast? Lower ISO?

9.

ISO 250, SS 1/80, F5.3
This is another example of a shot with a "cool" color cast. It is a bit blue. What should I have changed here?

10.

ISO 160, SS 1/100, F5