Saturday, November 29, 2008
A little difference
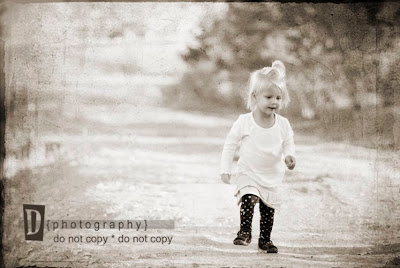
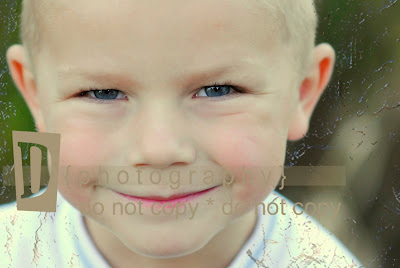
I took these two shots tonight. I am trying to pay more attention to what is in the whole frame. In the first one, I am distracted by some of the background:
Friday, November 28, 2008
Too good to be true
If you are a computer memory freak like me, you worry about how much space you have on your hard drive. You can't beat this deal....FREE!
Buy three qualifying SanDisk memory card (CF or SD) and get a $60 rebate. I bought from Adorama.com and my check out total was $59.85 (no shipping charges and no tax). This means FREE!
Check it out...
Here are the links
adorama.com
REBATE
BTW, when you click on the Adorama site to purchase your three cards, it will take you to Amazon, but it clearly says they are being purchased and shipped by Adorama. That doesn't make sense to me, but they must have some sort of business arrangement. I am sure the rebate will be good because they item #'s match. If you are doubtful, try B & H Photo (they are another qulifying participant but you will probably have to pay shipping).
Can't argue with that! :)
Wednesday, November 26, 2008
I got him!
Tuesday, November 25, 2008
Monday, November 24, 2008
Focus
I have been working on my focus...It seems it is a never ending process.
I love this kid! BTW...have you ever noticed that in almost every picture of my kids, they have food on their face. I swear I clean them up. This camera is just shows too many details. :)
(the first of each image is SOOC, the second is edited)
I love this kid! BTW...have you ever noticed that in almost every picture of my kids, they have food on their face. I swear I clean them up. This camera is just shows too many details. :)
(the first of each image is SOOC, the second is edited)
Thursday, November 20, 2008
JMK Shoot
I did a quick shoot today on my way somewhere. I found a cool truck and some fun environmental textures. Kinda a fun morning.
Wednesday, November 19, 2008
Happy Anniversay to me!
Today is my anniversary. Here's to NINE years- love ya!
(this was taken this last weekend by Arya Wiese)
Monday, November 17, 2008
Portrait Assignment Part I
This is part I of my portrait assignment. There are a few of what I captured. Self-portrait and perhaps the hubby to come later. :)
1) Not sure about the composition here.
2) Again, the composition...does the head crop look intentional?
1) Not sure about the composition here.
2) Again, the composition...does the head crop look intentional?
3) This is an indoor shot and I think it turned out suprising well. Does the head crop look intentional?
4) Going for sunglare. Can't figure out how to get the sun and the spots and not the gray haze across the photo.
I think in general, I am still working on the same things. Focus (most of these were taken at f/1.8 though), compositon (I think I am getting better but still working on it), exposure (usually my color casts are awful) and creativity (I usually ende up trying to copy work that someone else has done).
Saturday, November 15, 2008
Took some shots today
I had the opportunity to shoot a fun family today. The children weren't crazy about it at first -- probably because I was nervous! As I became more comfortable and they got to know me, their little smiles were a lot of fun. By the end I felt like I had a bunch of new little friends. Thank you "A" for great morning! Oh, and Patten, the dog, was amazingly well behaved!
Here is a link to my photostream where my favorites are posted.
Here's one of my kids that I shot...I learn so much from these experiences. I hope I am getting better!
Here is a link to my photostream where my favorites are posted.
Here's one of my kids that I shot...I learn so much from these experiences. I hope I am getting better!
Wednesday, November 12, 2008
Polaroid
Oh my goodness....I think I'm addicted. :)
.
I just learned out to do a Polaroid effect on a photo. Not sure this is rocket science, I just never have tried to do it before.
P.S. I think I am going crazy! I have lost my compact flash card for my camera. I think it was last in the computer and one of those cute little kids moved it. Or, I moved it and can't remember where I put it....Either way...uggggh!
White Balance edits in PSE
Oh my...I have been trying to learn some valuable editing skills in PSE. Today I feel like I hit the "mother load". My goal is to still take great sooc images, but if I don't and get a shot that I think is worthy of saving, I want to be able to keep it. So, here is the before (obvious white balance issues):
After a few clicks, here is the after (I think much better):
After a little sharpening and cropping:
(Now I am not saying this particular image is all that fantastic and that I have been dying to edit it so I could print and frame it. But if the original was in focus and composition was good, just think of the possibilities) :)
Monday, November 10, 2008
Adding Texture
This is getting fun!
Another photoshop skill I have been wanting to use is adding texture. There are some beautiful photos out there with texture. I don't ever want to get caught going overboard with it but here is how you do it - at least this is what I taught myself to do.
I started with my texture photo (from flickr) and my edited photo.
I then drug my texture on top of my photo and made it the same size (or larger) as my photo)
On the texture layer I reduced the opacity to 50% and changed the blending option to Pin Light (you have several options). I then erased (on the texture layer) around the face/skin/ears.
Then I flattened image and added a watermark. Whala....
Another texture
Making a Watermark
I have been wondering for a while how to best watermark my images. So guess what, I finally figured it out...I am not going to take the time to screen capture each step but here they are (keep in mind I use Elements 6.0):
1) Create a New blank file, and make it approximately 6 inches wide, 2 inches high, 300 dpi, with a transparent background. This will make a brush that will watermark a pretty large image, but you can always make your brush bigger if you want by making your blank file bigger.
2) Add graphics you have and text (using the Text Tool) in whatever format you want.
3) With the Marquee tool, draw a box around (select) everything you want in your logo.
4) Once it is selected (you'll see the marching ants), click on Edit, Define Brush from Selection.
5) Name your brush and click on OK.
Select your brush tool. Your brush should be the last brush in the brush pull-down menu. You can always change the size of your brush too to more closely match the size of your image. You can also change the color of your brush.
Here is a visual and description (afterall, I am a visual learner myself).
This is where the brush tool is located:
A description of where the brush options are and how to change them:
This is what the color selector looks like:
6) As a side note, I always save the file I created as a .psd so if I want to go back and change/add anything later, I don't have to start from scratch.
ETA: I have changed my logo several times since origially creating this tutorial. It has been super easy to go back and open the .psd file and change fonts and add/subtract text.
Here is an image. I can't believe it was so easy.
Friday, November 7, 2008
hula hoop assignment
My latest assignment was to toss a hula hoop. Using that as a working area, take 5 and only 5 pictures of what is insde the hula hoop. Then stand inside of it and take 5 and only five photos of things (not moving outside of that circle.
Problem #1, I don't have a hula hoop. So, I used my imagination.
This assignment was great! No practice shots and I am not editing any of these...Most of the exposures are way off...
Inside the hula hoop:
#1
#2
#3
#4
#5
Me inside the hula hoop taking pictures of what's around me.
#1
#2
#3
#5 ( I had to beg him to come close enough)
Problem #1, I don't have a hula hoop. So, I used my imagination.
This assignment was great! No practice shots and I am not editing any of these...Most of the exposures are way off...
Inside the hula hoop:
#1
#2
#3
#4
#5
Me inside the hula hoop taking pictures of what's around me.
#1
#2
#3
#4
#5 ( I had to beg him to come close enough)
What I learned:
1) I could never be a film photographer. Everything would come out all wrong. Actually, I already knew that. The BW Film photography class I took 10 years ago in college gave me my first clue. Thank goodness for digital!
2) Before clicking away, I need to get in the practice of checking settings and nailing composition. I only need one great or "right" shot not 20 kinda good ones. I should take the time to get it right the first (or second) time.
3) I love taking pictures. Someday I hope I can make money doing it.
Subscribe to:
Posts (Atom)